Avenue Decor Avenue Decor

Top 10 Tips for Cutting UV Wall Panels Without Cracking

Time:2026-09-10 Author:Henry
0%

Cutting UV wall panels looks simple until the glossy coating chips, flakes, or forms a white stress line. The damage may appear several centimetres away from the blade. That is why installers need more than a sharp tool. They need controlled pressure, stable support, and a cutting method suited to the panel’s core.

The practical question is: “How to cut UV wall panels without cracking the coating?” Materials specialist George Wypych is widely known for his work on polymer processing and surface behavior. His guidance can be reduced to one useful principle: “Control heat, support the sheet, and let the tool do the work.” The wording is simple. The application is not.

This guide presents ten field-tested habits for cleaner cuts. It covers blade selection, panel positioning, protective masking, scoring depth, cutting speed, and edge finishing. A fine-tooth blade may work well on one panel, yet create heat on another. That difference matters. Panel thickness, coating hardness, and tool condition all change the result.

Begin with a small offcut.

A test cut can reveal hidden problems before the finished panel is ruined. Keep the panel fully supported, especially near corners and narrow strips. Avoid forcing the blade through resistance. Slow, steady movement usually produces less vibration and fewer coating fractures. Still, no method is perfect. Even experienced installers sometimes misjudge heat buildup or backing support. Careful inspection remains essential. The best finish often comes from patience, not speed.
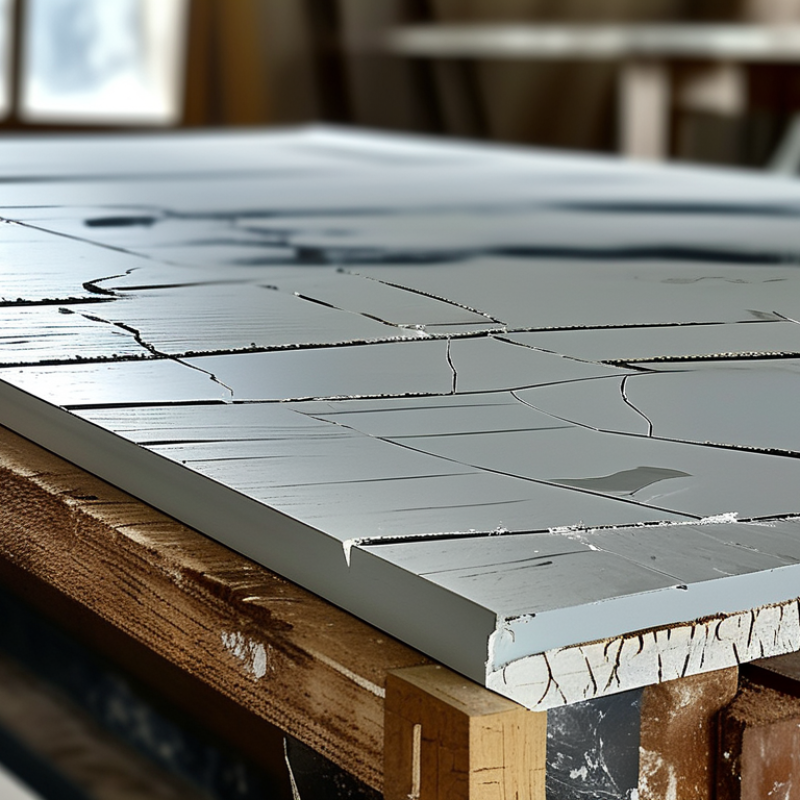
Top 10 Tips for Cutting UV Wall Panels Without Cracking

Choose the Right Tools and Cutting Method for UV Wall Panels

Choosing the Right Tools and Cutting Method for UV Wall Panels

UV wall panels often combine a rigid core with a glossy decorative surface. That finish can chip when the blade heats, bends, or moves too quickly. For straight cuts, use a fine-tooth carbide blade with 60 to 80 teeth. A scoring knife works better for thin panels. Select the method according to thickness, panel backing, and cut shape.

The U.S. Occupational Safety and Health Administration estimates that about 2,000 workplace eye injuries occur daily. Wear sealed safety glasses, gloves, and hearing protection. Clamp the panel on a flat sacrificial board. Keep the protective film attached, then mark the cut on its surface. A zero-clearance support can reduce vibration, although it does not prevent every crack.

Tips: Score several times with steady pressure. Do not force the blade. For power tools, set a moderate speed and keep the feed smooth. Cut with the finished face positioned according to the blade’s exit direction. Test on an offcut first. A small trial piece can expose hidden brittleness.

For curves, drill a starter hole before using a fine-tooth jigsaw blade. Avoid aggressive blades designed for rough timber. The International Association of Certified Home Inspectors notes that thermal movement affects many plastic-based building materials, so leave the specified expansion gap during installation. I still recheck every measurement. Glossy surfaces can make a correct line look misplaced, especially under strong work lights.

Measure and Mark the Panel Before Making Any Cut

Top 10 Tips for Cutting UV Wall Panels Without Cracking

Measure and mark the panel before making any cut. A rushed pencil line can become a permanent installation error. Start by checking the wall height at three points. Walls rarely behave perfectly. Record the smallest measurement, then allow the clearance stated in the panel’s technical sheet.

Use a steel tape, a rigid straightedge, and a fine-tip pencil. Mark the finished face only when the surface will not be scratched. Otherwise, mark the reverse side and apply low-tack masking tape along the cutting path. Extend the line across the full panel width. This prevents the blade from drifting near the edge. Measure twice.

The U.S. Occupational Safety and Health Administration reports that workplace eye injuries affect thousands of workers daily, making eye protection essential during panel cutting. OSHA’s Eye and Face Protection guidance also supports using protection against flying particles. Wear safety glasses, keep both hands away from the blade, and support the panel close to the cut. A 2023 report from the U.S. Bureau of Labor Statistics continues to classify contact with objects and equipment as a major source of workplace injuries, reinforcing the need for controlled cutting practices. I sometimes mark too lightly when working quickly. That mistake is avoidable. A visible line, stable support, and one calm pass usually produce a cleaner edge.

Top 10 Tips for Cutting UV Wall Panels Without Cracking

Measure and mark the panel carefully before making any cut. The chart shows a practical preparation sequence and the recommended number of checks for each step.

Use a sharp, fine-tooth blade, support the panel on a stable surface, and keep the protective film in place during cutting whenever possible. Measuring twice and confirming the marked line before cutting can help reduce alignment errors and edge damage.

Support the Panel to Prevent Vibration and Surface Stress

Cutting UV wall panels safely starts with controlling movement. Place the panel on a rigid, level workbench. Add clean foam pads beneath it for continuous support. The surface should remain flat from edge to edge. Unsupported sections can vibrate when the blade enters or exits. That vibration may create chips, hairline cracks, or visible stress marks.

Tip: Secure the panel with wide clamps and soft protective layers. Position the clamps close to the cutting line, but never directly on it. Tighten them gently. Excessive pressure can dent the decorative surface or distort the panel. Use a sharp, fine-tooth blade and guide the tool steadily. Let the blade do the cutting. Pushing too hard often creates heat and rough edges.

Before cutting, mark the line on low-tack tape. This can reduce surface scratches and improve visibility. Support both sides of the cut, especially near corners and narrow strips. I have found that a second support block often makes more difference than a faster blade. Still, this is easy to overlook. Check the setup again after the first few centimeters. If the panel chatters, stop immediately and improve the support. A smooth cut should feel controlled, not forced. Wear suitable eye and hand protection, and keep the work area clear of loose debris.

Cut Slowly with Proper Blade Pressure and Cooling

Cutting UV wall panels demands patience, especially when the surface finish must remain clean. A fast blade creates friction, heat, and vibration. Those forces can turn a small cut into a long crack.

Mark the panel on its protective film. Support both sides near the cutting line. Use a sharp, fine-tooth blade designed for plastics. Keep the blade moving slowly, but do not force it through the panel.

Light, steady pressure works better than pushing. Too much pressure is tempting. It is also a common mistake.

Cooling matters. Pause after several centimeters if the cut edge feels warm. Compressed air can clear chips, while a controlled water mist may reduce heat and airborne dust when the tool and workspace allow it. NIOSH engineering-control guidance favors source control over relying only on work habits. ASTM D618 also recommends conditioning plastics near 23°C and 50% relative humidity before testing, which helps reduce unpredictable dimensional movement. Real installation sites are rarely that stable.

Keep the panel flat and inspect the blade after every long cut. A dull tooth often leaves white stress marks before cracking appears. I sometimes cut too cautiously and create a rough edge, so the feed rate still needs adjustment. Make a short test cut first. Measure the edge, check the corner, then continue with smaller blade pressure and regular cooling pauses.

Smooth the Edges and Inspect for Hairline Cracks

After cutting UV wall panels, the edge often reveals more than the cut line. A clean surface can still hide a pale, threadlike crack near a corner. I check each panel under a bright, angled work light before installation. This exposes uneven pressure marks and small fractures that normal room lighting misses. Wear eye protection, keep the panel supported, and use a fine-tooth blade suited to the material. Rushing the last few centimeters is a common mistake.

I smooth the edge with fine-grit abrasive paper, moving in one direction rather than sawing back and forth. Light pressure is enough. Too much friction can soften the edge and create a wavy profile. For narrow cuts, I use a sanding block to keep the edge square. Then I run a fingertip along the cut without forcing it. A sharp ridge, loose chip, or gritty spot deserves another inspection. Do not rely on touch alone; hairline cracks may be too small to feel.

I inspect both faces and the cut ends, especially around drilled openings and internal corners. Hold the panel against a dark background and rotate it slowly. A crack may appear as a short silver line. If one continues during gentle movement, I set that piece aside. I once accepted a panel that looked acceptable from the front, and the defect widened after fitting. That was avoidable. Photograph questionable areas and check the blade, feed speed, and support spacing if cracks keep appearing.

FAQS

: What blade works best for straight cuts?

: Use a sharp carbide blade with 60 to 80 fine teeth. For thin panels, a scoring knife may work better. Avoid rough timber blades. They can chip the glossy surface.

How should the panel be supported?

Place it on a rigid, level workbench with clean foam pads underneath. Support both sides of the cutting line. Add a second support block near corners or narrow strips. This small step is easy to miss.

How can I reduce surface scratches?

Keep the protective film attached during marking and cutting. Mark the line on low-tack tape or the film. Use wide clamps with soft protective layers. Keep clamps close, but never directly on the cut.

How fast should I cut?

Use a moderate tool speed and a smooth feed. Apply light, steady pressure. Do not force the blade. Slow, controlled cutting creates less heat and vibration. Too slow can also leave a rough edge.

How can I prevent cracking and overheating?

Stop when the edge feels warm. Pause after several centimeters and clear chips with compressed air. A suitable water mist may help in controlled conditions. Keep the tool and workspace appropriate for moisture. I sometimes cut too cautiously, so feed speed still needs checking.

What should I do before making the full cut?

Test the method on an offcut first. Check the edge, corner, and hidden brittleness. Measure the trial piece before continuing. A small test can reveal problems early.

How should I cut curves or openings?

Drill a starter hole before using a fine-tooth jigsaw blade. Make the hole large enough for smooth blade entry. Support the panel around the opening. Aggressive blades may tear the decorative layer.

Is an expansion gap necessary during installation?

Yes, leave the specified gap for thermal movement. Plastic-based panels can change slightly with temperature. Keep the panel flat during cutting and installation. The exact gap depends on the installation instructions and site conditions. Real sites are rarely stable.

Conclusion

Cutting UV wall panels cleanly requires careful preparation, the right tools, and a controlled working process. How to cut UV wall panels without cracking the coating? Start by selecting a fine-tooth blade or cutting method suitable for the panel material, then measure and mark the cutting line accurately on the protected surface. Double-check all dimensions before cutting to avoid unnecessary adjustments that may weaken the panel.

Place the panel on a stable, fully supported surface to reduce vibration, bending, and surface stress. Cut slowly with steady, moderate pressure rather than forcing the blade through the material. If friction creates excessive heat, pause occasionally or use appropriate cooling to protect the coating and prevent deformation. After the cut is complete, smooth the edges with suitable abrasive paper or a finishing tool. Finally, inspect both the cut edge and the surrounding surface for chips, rough spots, or fine hairline cracks before installation.

Henry

Henry

Henry is a dedicated marketing professional with a profound expertise in the company's offerings. With years of experience in the industry, he possesses an impressive understanding of the market dynamics and consumer behaviors that drive success. Henry is committed to sharing his insights through......