Avenue Decor
UV wall panels can look flawless on installation day, then lift at the corners weeks later. The problem is rarely sunlight alone. Moisture, weak bonding, uneven walls, thermal movement, and unsuitable adhesive often work together. What causes UV wall panels to peel off after installation? This question deserves a site-based answer, not a product-only explanation.
The U.S. Environmental Protection Agency identifies uncontrolled moisture as a major building-performance risk. Moisture behind a panel can weaken adhesive and create bubbling. ASTM E96 provides methods for measuring water-vapor transmission, which helps assess damp substrates. ASTM D3359 also offers a recognized method for evaluating coating adhesion through tape testing. These standards do not replace installation guidance, but they provide useful technical reference points.
Experienced installers usually begin with a dry, clean, stable surface. Dust feels harmless. It is not. Grease, loose paint, and plaster residue can form an invisible release layer. Temperature matters too. A sun-heated wall may expand during the afternoon and contract overnight. If the adhesive cannot tolerate that movement, the panel may gradually separate. Corners often show the first warning.
Manufacturer data sheets remain authoritative because adhesive compatibility varies between PVC, acrylic, composite, and painted substrates. A careful installer checks moisture, flatness, surface strength, and curing time before fixing panels. Still, field conditions are imperfect, and even experienced teams can miss a damp patch behind a sink. That uncomfortable possibility matters. Prevention requires inspection records, correct adhesive selection, firm rolling pressure, and sufficient curing time—not simply stronger glue.
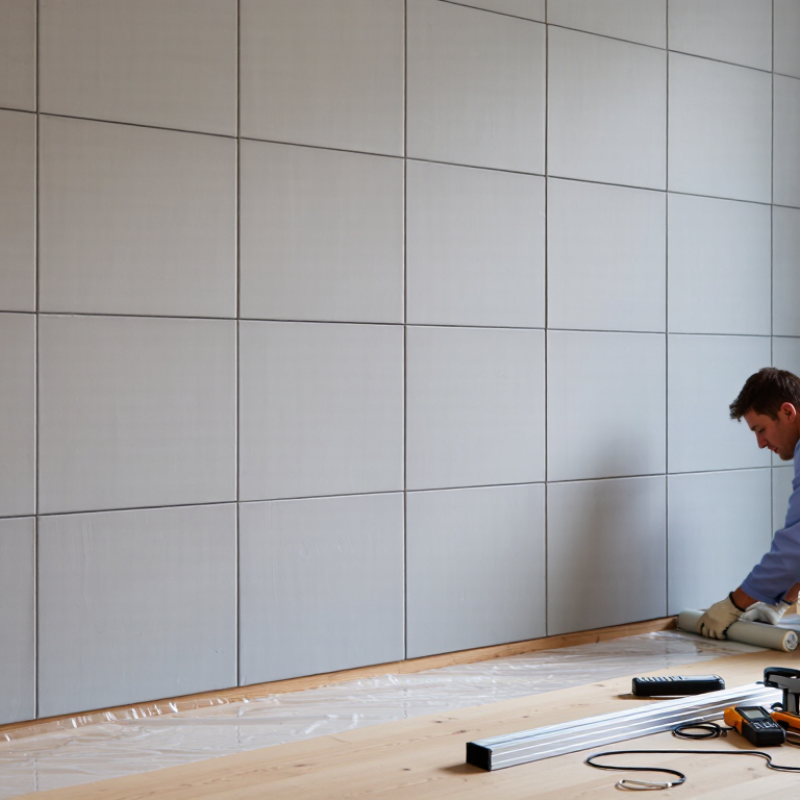
Peeling often begins with moisture trapped behind the panel. In bathroom inspections, I have found damp plaster, leaking pipes, and unsealed wall joints beneath loose edges. The surface may feel dry, yet moisture can remain inside porous masonry. Test the wall with a moisture meter before installation. Repair leaks, improve ventilation, and allow the substrate to dry fully. Do not cover fresh plaster or wet filler.
Heat creates another hidden problem. Direct sunlight or nearby appliances can warm the panel and soften unsuitable adhesive. Repeated heating and cooling then stress the bond. Keep panels away from intense heat sources when possible. Follow the adhesive maker’s temperature limits. A small gap at fixed edges may also help accommodate expansion, but the required gap depends on the panel system.
Adhesion fails when dust, grease, paint flakes, or uneven surfaces remain underneath. Clean the wall carefully and remove weak coatings. Lightly level deep dents before applying adhesive. Use the recommended adhesive, spread it evenly, and press the panel across its full surface. Movement matters too. Walls can shift slightly as buildings settle, while flexible panels expand at different rates. Rigidly fixing every edge can concentrate stress. I have seen installers blame poor adhesive when wall movement was the real cause. That mistake is easy to repeat. Check the substrate, temperature, moisture, and panel alignment before blaming the product.
Peeling often begins behind the panel, not at its visible edge. Excess moisture weakens adhesive contact and can create vapor pressure. Before installation, measure the wall with a calibrated moisture meter. Keep the reading below 4%, according to the project specification. Do not rely on touch alone. A dry-looking wall may still hold moisture inside plaster, cement board, or masonry.
Surface chemistry matters too. Keep the wall pH between 5 and 9. Highly alkaline surfaces can attack some adhesives, while acidic residues may reduce bonding strength. ASTM F710 recognizes pH testing as a practical part of substrate preparation, although its limits apply to resilient flooring. Use the adhesive maker’s technical data for the final requirement. Test several locations, especially near windows, plumbing, and exterior corners. Record every result. This small record improves traceability.
Tips: Clean dust, oil, and loose paint first. Let repaired areas cure fully. Lightly abrade glossy surfaces. Check moisture again after cleaning. A quick wipe test is not enough. In practice, rushing this stage causes avoidable failures. ASTM F2659 also recommends using suitable moisture assessment methods rather than guessing from surface appearance. If readings remain high, stop installation and investigate leakage, condensation, or trapped vapor. Safety margins are worth the extra day.
How to Prevent UV Wall Panels from Peeling Off?
Temperature changes can make UV wall panels expand, contract, or lose contact with adhesive. Proper acclimation reduces this movement before installation begins. Keep the unopened panels inside the installation room for at least 48 hours. Maintain a stable temperature between 15°C and 30°C during this period.
Lay the cartons flat on a clean, dry surface. Do not lean panels against a wall, where they may bend slightly. Keep them away from direct sunlight, heaters, air conditioners, and damp areas. Use a room thermometer instead of guessing the temperature. Small details matter. Before fitting, inspect every panel for curling, damaged edges, or surface defects.
The wall should also be dry, clean, smooth, and free from dust or grease. After acclimation, test-fit several panels and leave the recommended expansion gap around corners and fixed objects. Apply adhesive evenly, especially near edges, but avoid excessive adhesive that creates uneven pressure. Press the panel firmly with a clean roller or soft block.
Installers often find that rushing this stage causes avoidable peeling. A panel may look stable after fitting, then lift when the room warms. That pause matters. However, acclimation cannot correct severely warped panels or a damp wall. In uncertain conditions, check the panel supplier’s technical guidance and test one small area before completing the entire installation.
Acclimate UV panels for 48 hours at 15–30°C before fitting.
Keep the panels in the installation environment for the full 48-hour acclimation period. Maintaining a temperature between 15°C and 30°C helps the panels adjust before fitting and can reduce movement-related stress that may contribute to peeling.
UV wall panels usually peel because the adhesive bonds to dust, moisture, or an incompatible coating. A clean surface matters more than a thick adhesive layer. Remove grease, loose paint, and powdery residue before installation. Let the wall dry completely. Even a slightly damp substrate can weaken the bond.
Choose an adhesive approved for both the panel backing and the wall material. Check its technical data sheet, curing time, temperature range, and movement tolerance. Apply enough adhesive to cover 80–90% of the panel area. This creates uniform contact without leaving large hollow zones. Spread it with the recommended notched trowel, then press the panel firmly into place. Work from the center outward to release trapped air. Do not rely on a few heavy beads.
Keep the panel supported during curing. Follow the adhesive’s stated setting period, even when the surface feels dry. In my experience, rushing this step causes more failures than poor application. Test a small area first. That test may reveal an unexpected reaction between the wall coating and adhesive. I once treated a smooth surface as ready, but fine dust remained after cleaning. The panel held at first and lifted weeks later. A simple wipe test and small trial bond would have exposed the problem earlier. Avoid installing in extreme heat, cold, or high humidity. Check the edges again after curing, especially near corners and joints.
How to Prevent UV Wall Panels from Peeling Off?
Sealed joints and stable temperatures are critical during the first 24 hours after installation. Before fixing the panels, check that the wall is clean, dry, flat, and free from loose paint. Dust around a joint can prevent sealant from bonding properly. Keep the room between 15°C and 30°C, including the wall surface. A cold wall may slow curing, while excessive heat can skin the sealant too quickly.
Apply sealant continuously along every panel joint, corner, and exposed edge. Avoid broken lines and oversized gaps. Press the panels firmly into position, then wipe away excess sealant with a suitable tool. Do not rely on appearance alone. A joint may look closed while leaving a narrow channel behind the panel. That hidden gap can admit moisture and create lifting pressure. Use temporary tape or supports where panels tend to move.
During the first 24 hours, keep the area dry and protect it from strong sunlight, heaters, and sudden temperature changes. Maintain gentle ventilation, but avoid strong airflow directly across the joints. In site inspections, peeling is often blamed on weak adhesive. Sometimes, the real issue is an unsealed edge or a wall that was too cold. I have also seen rushed cleaning damage fresh joints. Allow extra curing time when humidity is high, and inspect the corners again before regular use. Mistakes happen. Careful checking prevents repeat repairs.
Moisture, heat, dust, weak coatings, poor adhesive, and wall movement can weaken the bond.
Use a moisture meter on several wall areas, especially near joints and plumbing.
Yes. Porous masonry may hold hidden moisture beneath a dry-looking surface.
Remove grease, dust, loose paint, and powdery residue.
Select an adhesive compatible with the panel backing and wall material.
Aim for approximately 80–90% coverage across the panel area.
Press firmly across the full surface, working from the center outward.
Yes. Sunlight and nearby appliances may soften unsuitable adhesive.
A small edge gap may help accommodate expansion, depending on the panel system.
Do not install over damp walls, fresh plaster, extreme temperatures, or high humidity.
What causes UV wall panels to peel off after installation? The most common reasons are trapped moisture, excessive heat, poor surface preparation, incompatible adhesive, insufficient adhesive coverage, and natural movement between the wall and panel. Before installation, check that the wall moisture level is below 4% and the surface pH is between 5 and 9. These conditions help create a stable base and reduce the risk of weak bonding.
Allow the UV wall panels to acclimate in the installation area for 48 hours at 15–30°C so they can adjust to the surrounding temperature. Use a compatible adhesive and spread it evenly across 80–90% of the panel surface to achieve consistent contact. After fitting, seal all joints carefully to prevent moisture from entering. Keep the area between 15 and 30°C during the first 24 hours, allowing the adhesive to cure properly and helping the panels remain securely attached.
