Avenue Decor Avenue Decor

How to Fix Particle Board Furniture Falling Apart in 2026?

Time:2026-09-20 Author:Sophia
0%

Particle board furniture is affordable, practical, and surprisingly fragile. A loose shelf, tilted drawer, or crumbling corner can appear without warning. Why is my particle board furniture falling apart? The usual causes include moisture, overloaded shelves, repeated movement, and weakened screw holes. Particle board contains compressed wood fibers, so it cannot hold fasteners forever when the material becomes swollen or crushed.

This 2026 repair guide explains how to inspect the damage and choose a realistic solution. You may need wood glue, larger screws, metal corner brackets, replacement cam locks, or a thin plywood reinforcement. Measure carefully. Check the back panel, shelf pins, joints, and cabinet base before tightening anything. A damp bathroom cabinet needs different treatment from a dry bedroom dresser. That distinction matters.

Some repairs work beautifully. Others only delay replacement. I have seen furniture look stable after one evening, then sag again under books a week later. That failure usually came from ignoring hidden moisture or repairing damaged particle board with glue alone. Do not trust a joint that still shifts by several millimeters. Remove the load and test it gently. Manufacturer instructions can also reveal weight limits and suitable hardware. When the board is badly swollen, cracked, or shedding fibers, replacement may be safer and more economical. Careful diagnosis prevents wasted materials and helps you avoid repeating the original mistake.
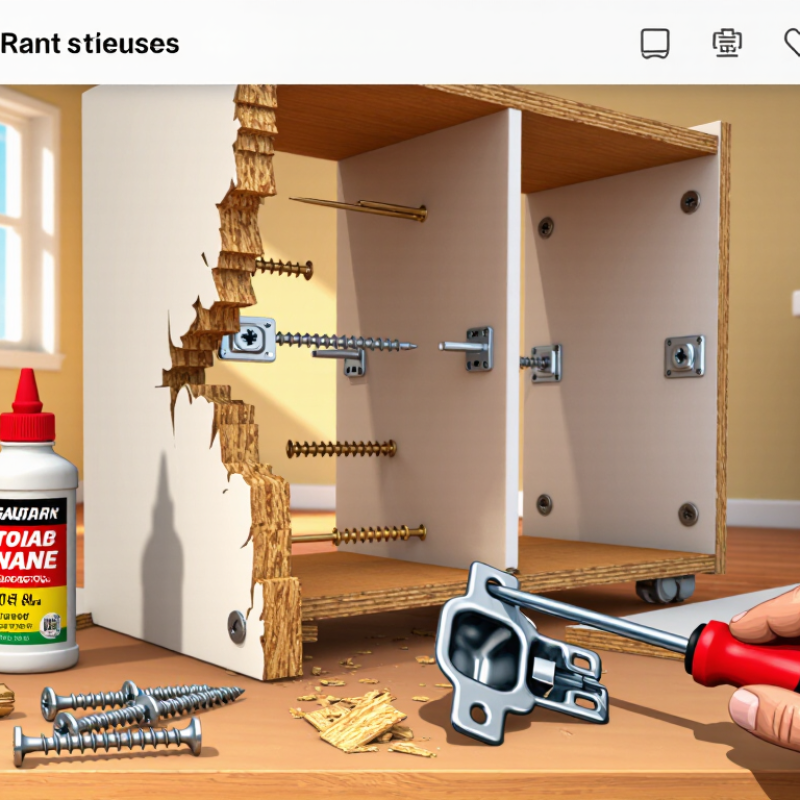
How to Fix Particle Board Furniture Falling Apart in 2026?

Identify the Causes of Particle Board Furniture Failure

Particle board furniture usually fails at its edges and joints, not across the entire panel. Moisture is the most common cause. A damp floor, leaking pipe, or humid room can make the board swell. Once swollen, it rarely returns to its original strength. Look for raised surfaces, soft corners, or brown dust near screw holes.

Fasteners create another weak point. Particle board holds screws reasonably well when they enter undamaged material. Repeated movement, over-tightening, or a screw placed too close to an edge can strip the internal fibers. Cam locks and dowels may also loosen when a cabinet is dragged instead of lifted. I once blamed poor material for a failing shelf, but the real problem was an uneven floor twisting the frame.

Weight and unsupported spans matter, too. Books, appliances, or stored tools can slowly bend a shelf beyond its design limit. Missing back panels may allow the cabinet to rack from side to side. That movement enlarges joint holes with every use. Check whether the panel feels flexible, whether doors sit unevenly, and whether joints separate under light pressure. A moisture meter can provide useful evidence, although visible swelling may already reveal the damage. Heat near a radiator can dry exposed edges and weaken old adhesive. Small details often explain the collapse.

Gather the Right Tools and Repair Materials

When particle board furniture starts falling apart, the right tools matter more than force. Prepare a cordless drill, small clamps, a countersink bit, a utility knife, a square, and fine-grit sandpaper. Add wood adhesive, matching particle-board screws, wooden dowels, repair filler, and thin hardboard patches. Particle board has weak edges, so ordinary wood screws may strip the core quickly.

Remove loose hardware and scrape away crumbly material. Test-fit every joint before applying adhesive. For a split shelf, clamp a hardboard patch beneath the damaged area, then drive short screws through the patch. Use pilot holes slightly narrower than the screw shaft. This reduces bulging and accidental edge blowout. The USDA Forest Products Laboratory’s Wood Handbook identifies moisture changes as a major source of wood-product movement, so let damp parts dry fully before repairing them.

Do not overfill torn screw holes. Pack them with dowel pieces and adhesive, allow curing, then drill new pilot holes. I have learned that rushing this stage creates a joint that looks fixed but fails under ordinary weight. The U.S. Environmental Protection Agency reported 18.6 million tons of wood in the 2018 municipal waste stream, with 12.1 million tons landfilled. Repairing sound furniture can therefore prevent unnecessary material waste, although severely swollen board may not be worth saving. Check each repaired joint after 24 hours, then load it gradually.

Disassemble and Clean the Damaged Joints

When particle board furniture starts loosening, resist the urge to add more screws. Disassemble the unit on a padded floor, not a hard tile surface. I learned this after a shelf corner split while forcing a stubborn cam lock. Take clear photos before removing anything. Mark each panel and fastener with masking tape. Labels save time. Remove doors, shelves, and back panels gently. Keep hardware in separate containers.

Inspect every joint under bright light. Look for crushed fibers, enlarged holes, loose dowels, and swelling from moisture. Brush away loose particles with a soft brush. Then vacuum the joint carefully. Use a barely damp cloth for residue, and let the area dry completely. Do not soak particle board; water can make the core expand. A clean, dry joint reveals the real problem. Sometimes the damage is worse than it first appears.

Test-fit the pieces before applying adhesive or replacement hardware. If a screw spins without gripping, the hole has lost strength. I once tightened one too much and made the opening wider. That repair failed. A fitted insert, compatible fastener, or replacement panel may be safer. Choose parts matching the original dimensions. Reassemble slowly, keeping panels square. Tighten until secure, not until the board flexes. If a joint remains loose after cleaning, stop and reassess the panel.

How to Fix Particle Board Furniture Falling Apart in 2026?

Disassemble and Clean the Damaged Joints

Use coarse 80-grit abrasive paper to remove loose fibers and old adhesive, then progress through 120, 180, and 220 grit for a cleaner, smoother joint surface before applying fresh adhesive and reassembling the furniture.

Rebuild Weak Areas with Stronger Fasteners and Adhesive

Particle board furniture usually fails where screws crush the core or moisture swells the panel. The USDA Forest Products Laboratory’s Wood Handbook explains that particleboard strength depends heavily on density, thickness, and moisture exposure. ANSI A208.1 also separates panels by performance grades, so one repair method cannot fit every cabinet.

Remove loose hardware and vacuum the grey, crumbly fibers. Let the area dry fully. I prefer a slightly larger pilot hole, then a threaded insert or a longer coarse-thread screw with a wide washer. Keep the screw at least 25 millimeters from an edge when the panel allows it. For stripped holes, pack the void with hardwood slivers and structural wood adhesive, then clamp the joint overnight. Adhesive alone is not enough.

A 2021 USDA Forest Products Laboratory review warns that swelling can permanently reduce fastener holding capacity. That matters under sinks and near unsealed floor edges. Seal exposed edges with several thin adhesive coats, not one thick layer. Two-part epoxy can reinforce a severely crushed section, but it may become harder than the surrounding board and create a new stress point. I have seen that mistake split a narrow shelf. The repair looked strong. It was not. Recheck the joint after 24 hours, then load it gradually. Industry testing under ASTM D1037 also measures thickness swelling and water absorption, reminding us that moisture control is part of structural repair, not decoration.

How to Fix Particle Board Furniture Falling Apart in 2026? - Rebuild Weak Areas with Stronger Fasteners and Adhesive

Weak Area Typical Cause Recommended Reinforcement Fastener Guidance Adhesive Guidance Minimum Cure or Rest Time Expected Result
Loose cabinet side joint Stripped screw threads or repeated movement Add a hardwood cleat inside the corner and clamp the joint square Use coarse-thread screws; keep the screw length short enough to avoid breaking through the panel Apply wood adhesive to clean, tightly fitted surfaces; remove excess before it hardens Leave clamped according to the adhesive label; avoid loading for at least 24 hours A more stable joint with improved resistance to racking
Hinge screws pulled out Particle board has lost its internal grip around the hinge plate Move the hinge slightly to sound material or install a backing plate Use pilot holes and screws designed for the replacement plate; do not overtighten Use adhesive only as a supplement; it should not be the sole support for a moving hinge Allow the repair area to set before reinstalling the door Better door alignment and reduced hinge movement
Shelf-pin holes enlarged Overloaded shelf or repeated removal of shelf pins Fill damaged holes and redrill, or install a continuous shelf support strip Use a support strip secured into undamaged material; maintain even spacing Use a compatible wood filler or repair compound before drilling new holes Wait until the filler is fully hard before drilling or applying weight More reliable shelf support and less localized stress
Bottom panel sagging Long span, heavy contents, or weakened edge support Install a front-to-back or side-to-side support cleat beneath the panel Fasten into solid cleat material rather than relying on damaged particle board edges Bond the cleat to a clean surface and use mechanical fasteners while it sets Keep the unit unloaded until the adhesive has reached its stated handling strength Reduced deflection and better distribution of stored weight
Back panel separating Loose nails, staples, or loss of squareness Square the cabinet and replace failed fasteners with screws or small brads where material is sound Use several evenly spaced fasteners; avoid placing them too close to panel edges Apply a thin adhesive bead along clean contact edges Keep the cabinet square and undisturbed during the adhesive setting period Improved squareness and reduced side-to-side wobble
Cam-lock or dowel joint failure Connector hole wear, swelling, or repeated assembly Replace the connector where possible and add an internal corner block Use a connector-compatible replacement; do not force a larger screw into a split panel Bond the corner block to both panels and reinforce it with screws into sound material Allow the reinforced joint to cure before reassembly Greater joint stiffness than relying on a damaged connector alone
Water-swollen edge Moisture penetration caused swelling, crumbling, or delamination Remove loose material, dry completely, and rebuild the edge with a solid cleat or replacement section Fasten only after the remaining board is firm and dry Use an adhesive suitable for the materials and intended moisture exposure Drying time varies with moisture level, temperature, and ventilation A repairable edge when damage is localized; severely swollen panels may require replacement
Leg or base attachment loose High leverage at the joint or fasteners installed into weak edge material Add a wide internal mounting block or a metal corner brace Use multiple fasteners spread across the block; predrill to reduce splitting Bond the mounting block before final fastening, if the surfaces are clean and closely fitted Do not stand, sit, or place heavy loads on the furniture until fully cured A broader load path and lower stress on the damaged board

Repair note: Remove loose fibers, dust, and moisture before bonding. Predrill near edges, avoid overtightening, and follow the specific adhesive manufacturer’s instructions for working time, clamping, and final cure. Replace panels with extensive swelling, crushing, or structural cracking.

Reinforce, Reassemble, and Test the Repaired Furniture

How to Fix Particle Board Furniture Falling Apart in 2026?

Reinforce, Reassemble, and Test the Repaired Furniture

Repair begins with a careful inspection. Remove loose shelves, damaged cam locks, and swollen panels. Mark every connection before disassembly. Particle board loses holding power when screws repeatedly spin in enlarged holes. The USDA Forest Products Laboratory’s Wood Handbook, 2021, places fiber saturation near 30% moisture content and explains that moisture changes drive material movement. Keep every panel dry. Replace crushed sections instead of forcing them flat. I learned this the hard way; glue cannot restore missing board fibers.

Reassemble with fresh fasteners, corner blocks, and wide washers where suitable. Use pilot holes slightly narrower than the screw shaft. Do not overtighten. Add a solid wood strip behind weak joints, then clamp it until the adhesive cures. ASTM D1037 remains a key industry test method for evaluating wood-panel screw holding and thickness swelling. That matters because a visually tight joint may still fail under repeated loading. Anchor tall furniture to the wall. The U.S. Consumer Product Safety Commission continues to identify furniture tip-overs as a serious child-safety hazard.

Tips: Test each repaired joint by applying light pressure first. Add weight gradually. Leave the furniture loaded overnight, then inspect gaps, squeaks, and fresh cracks. If movement returns, stop using it. A repair that feels “almost solid” is not finished.

FAQS

What tools and materials should I prepare for a particle-board furniture repair?

Gather a cordless drill, small clamps, a square, a utility knife, and fine-grit sandpaper. Add a countersink bit, adhesive, matching screws, dowels, filler, and thin hardboard patches. Keep everything nearby.

Why should I test-fit joints before applying adhesive?

Test-fitting reveals gaps, twisting, and misaligned holes before the adhesive sets. Remove loose hardware and scrape away crumbly fibers. A dry fit can expose an embarrassing mistake early.

How can I repair a split shelf?

Let the damaged panel dry completely. Clamp a thin hardboard patch beneath the split, then drive short screws through it. Drill pilot holes slightly narrower than the screw shaft. This helps prevent bulging and edge blowout.

What should I do when a screw hole is stripped?

Do not overfill the torn hole with filler alone. Pack it with wooden dowel pieces and adhesive, then let it cure overnight. Drill a fresh pilot hole afterward. Rushing this step often creates a joint that only looks repaired.

How can I strengthen weak screw connections?

Use a threaded insert or a longer coarse-thread screw with a wide washer when suitable. Keep the fastener at least 25 millimeters from the edge. Adhesive alone is not enough.

How should I repair furniture damaged by moisture?

Dry swollen areas fully before working on them. Moisture can permanently reduce screw-holding strength. Seal exposed edges with several thin adhesive coats. One thick coat may crack or remain uneven. If the board stays swollen and soft, replacement may be wiser.

Is two-part epoxy always the strongest repair?

No. Epoxy can reinforce crushed board, but it may become harder than the surrounding material. That difference can create a new stress point and split a narrow shelf. Stronger is not always safer.

How should I test a repaired joint?

Wait at least 24 hours before checking the connection. Apply weight gradually, using a light object before anything heavy. Watch for movement, cracking, or fresh crumbs. I sometimes want to rush this test, but that is poor judgment.

Conclusion

If you are asking, “Why is my particle board furniture falling apart?”, the problem is usually caused by repeated stress, loose screws, moisture exposure, overloaded shelves, or weakened particle board around the joints. Start by inspecting where the panels separate, fasteners loosen, or edges crumble. Gather basic repair supplies, such as a screwdriver, clamps, wood adhesive, replacement screws, washers, and small reinforcing blocks. Choose materials that fit the furniture’s size and the extent of the damage.

Before repairing, carefully disassemble the affected sections and remove dust, loose chips, and old adhesive. Rebuild damaged joints with fresh adhesive and stronger, properly sized fasteners, avoiding excessive tightening that could split the board. Add brackets, support blocks, or reinforcement strips to areas that carry weight. Once the adhesive has cured, reassemble the furniture, check that every connection is secure, and test it gradually with light pressure before returning it to normal use. Regularly keeping it dry and avoiding overloading can help prevent future failure.

Sophia

Sophia

Sophia is a dedicated marketing professional with an exceptional depth of knowledge about her company's products and services. With a keen understanding of market trends and customer needs, she crafts insightful blog posts that not only inform but also engage readers, enriching the company’s online......